
Last Updated on: Jan 26, 2021
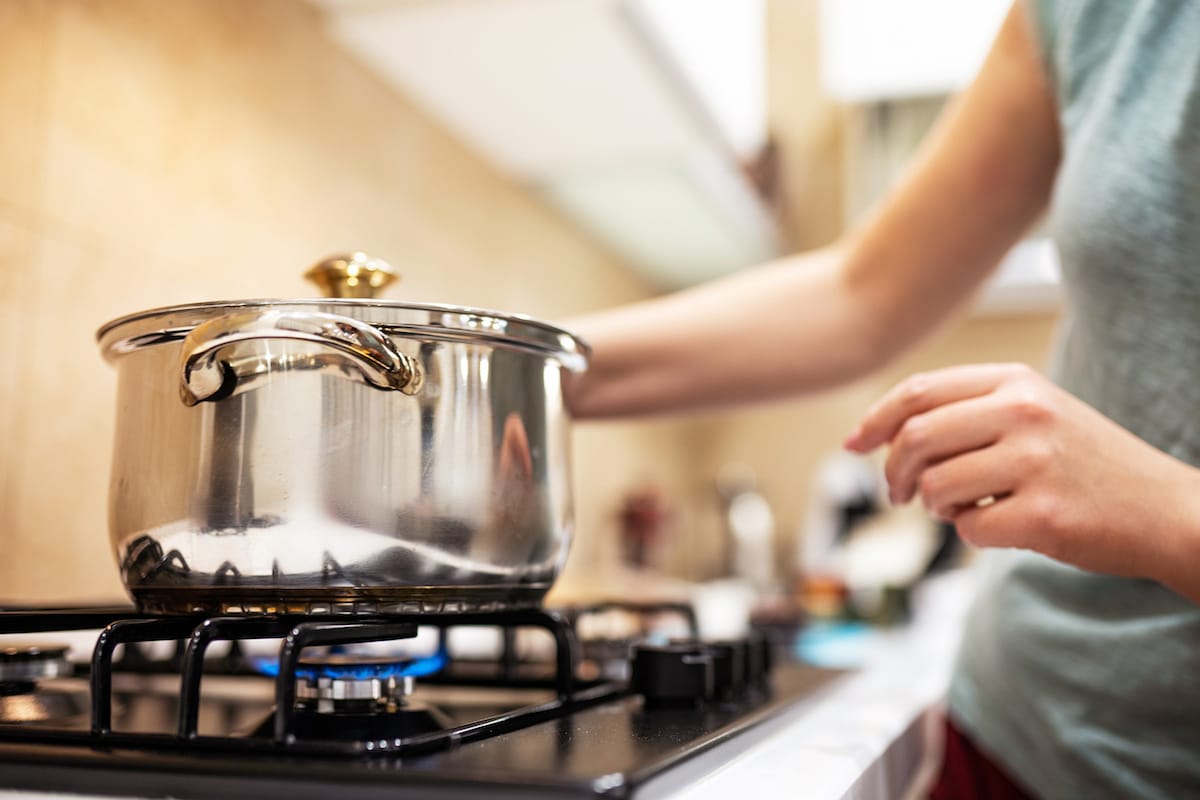
Outdoor grilling combines so many pleasant aspects, it’s no wonder it’s as popular as ever. Grilling involves getting together with friends and family. It allows the enjoyment of the great outdoors while creating culinary masterpieces. It adds flavor and pleases the senses with sizzle, smells and smoke. For many, grilling is a time to relax, be creative, and enjoy the payoff of making a great meal.
What We'll Cover
- Grilling Safety Tips
- Basic Grilling Rules
- Different Types of Grills and How to Use Them
- Preparing Your Grill
- How to Assess the Temperature
- How to Grill Meat
- Tenderize
- Season
- Place Meat on the Grill and Turn Meat
- Remove When It’s Almost Done to Liking
- Don’t Forget to Let it Rest Before Serving
- How to Grill Vegetables
- Add Light Oil to Vegetables
- Know the Proper Cook Time
- Cut Into Smaller Pieces for Faster Cooking
- For Small Pieces, Cook on a Skewer
- Cooking in Packets
- Cleaning Your Grill
Whether outdoor grilling involves a massive stainless steel kitchen on wheels with a complete outdoor kitchen checklist or is done on a small portable grill or two burner grill with some charcoal, there are techniques that can improve the experience. Proper cleaning, for example, can help promote food safety, quality and can even extend the life of a grill.
In this ultimate outdoor grilling guide, we’ll address outdoor grilling safety and basic grilling rules. We’ll delve into the variety of grill choices and the benefits and drawbacks of each. We’ll discuss preparing your grill to cook and how to best grill meat and even vegetables. Finally, we include the various ways to clean and maintain your grill to get maximum value and enjoyment.
As with any cooking technique, grilling outdoors should always place safety first.
Grilling Safety Tips
If you follow a few simple rules, outdoor grilling is extremely safe. It does, however, offer some challenges cooking in a kitchen does not. Each year, on average, about 10,000 home fires are attributed to outdoor grilling. Whether a grill is fueled by propane, charcoal or wood, there are specific issues to be aware of. Grilling frequently involves an open flame, which can flare up unexpectedly. Any outdoor grill should be stable and physically and mechanically sound.
A significant key to safety when grilling is ensuring food is prepared properly. In this section, we will focus on outdoor grilling safety do’s and don’ts and look at some grilling fire facts.
Do’s
First of all, an outdoor grill should only be used in open spaces with proper ventilation. Since it frequently involves an open flame, care should always be taken to keep any flammable materials away from the grilling surface and the grill should be a safe distance away from buildings and railings. Here are some important “do’s” when it comes to outdoor grilling safety.
- Only use a grill on a flat, level, stable surface.
- Keep hot grills a safe distance from any structures, outbuildings, and dry brush and lawn materials.
- Before operating, thoroughly read the instructions for any grill.
- Store propane tanks upright.
- Clean the grilling surface after each use.
- Make sure the grill is in good physical and mechanical condition.
- Turn off the propane at the burner controls and the supply valve when not in use.
- To light charcoal, only use fluids specifically designed for that purpose.
- Use long-handled grill tool sets when grilling outdoors to avoid burns.
- Wear bbq gloves when grilling in order to protect your hands from burns and grease splashes
- Pay attention to the direction smoke is traveling in.
- Keep a fire extinguisher nearby when grilling.
- Only light your propane grill with the lid open.
- Always make sure charcoal is completely extinguished and cool before disposal.
Don’ts
In many cases, staying safe when grilling involves what you don’t do as much as what you are doing. Here is a list of specific “don’ts” when grilling outdoors.
- Never leave a grill that is in use unattended.
- Don’t allow pets or children near a hot grill.
- Don’t spray flammable fluids on hot coals or flames.
- Don’t cover or store a grill until it is completely cool.
- Don’t keep propane tanks in a vehicle.
- Don’t spray flare-ups with water. Instead, just move foods to a cooler area of the grill while waiting for the flame to tame. Boat grills with regular exposure to water should have shields to prevent splashing.
- Don’t use the liquid that meat has marinated in for basting.
- Never leave lighter fluid near heat sources or where children can get to it.
- Avoid grilling when drinking alcohol.
Grilling Fire Facts
The National Fire Protection Association (NFPA) says that the over 10,000 average annual home fires attributed to grilling each year cause $123 million in property damage. In the period between 2013-2017, over 9,000 people each year were treated for grilling-related injuries. Unfortunately, children accounted for about 38% of contact burns involving grills each year. July is the peak month for grilling and is also the riskiest month for grilling-related fires.
Charcoal grills cause significantly less house-related fires than propane grills each year. This is due, in part, because propane grills are more popular than charcoal grills. Even on a per-capita basis, however, propane causes more house fires than charcoal.
Many fires are attributed to a mechanical failure, like a leaking hose or valve. This is why propane grills in particular should be carefully inspected before use. Also, make sure whatever grill stands you use are sturdy. Water with liquid dish soap helps show leaks. When the soapy mixture is placed on an area of a suspected leak and bubbles form, a leak is likely.
Before every grilling season, take time to inspect a grill to make sure it is in safe physical condition.
Basic Grilling Rules
Beyond the things to do and not do for safety reasons, there are some other basic grilling rules that should be followed for better and more consistent results.
- Keep the grate of the grill clean. Keeping the grill grate clean accomplishes several things. It helps prevent food from sticking to the grill’s surface and avoid getting those nasty, mysterious burned pieces from previous grilling efforts mixed into your current meal. Keeping the grate clean is also much easier than having to clean a massive build-up on the grate surface later.
- Grilling well takes time. Grilling is best enjoyed when the appropriate time is taken to prepare foods, heat the grill, and properly season and cook them. Enjoying the time it takes to cook outdoors is part of the thrill of the grill.
- Keep an eye on the grill. Grilling outdoors takes a little more personal attention than most indoor foods. Flare-ups will quickly spoil a well-planned grilled meal as can a charcoal fire that extinguishes on its own or a propane tank that empties midway through the grilling process. Keep an eye on the grill to better ensure the desired results.
- Spice or marinate foods at least an hour before cooking. Add seasonings early to allow more flavor to be absorbed by the foods. Whether you are using a marinade, dry rub, or simple sprinkling of some seasonings, add flavor at least one hour before grilling.
- Lightly oil the food, not the grill grate. Any oil put on the grill grate will quickly burn off in the high heat of grilling. Experienced grillers know it is better to lightly oil any foods being prepared on the grill to prevent sticking.
- Have and use the proper tools. These include long-handled tongs, brushes, and forks. Some outdoor chefs will wear an apron and/or mittens when grilling. If you’re looking for a camping mess kit, make sure it contains these items if you don’t already have them.
- Heat up the grill before grilling. Like pre-heating an oven, heating up the grill in advance provides a thorough, more even heat source and makes those signature grill marks on foods easier to achieve.
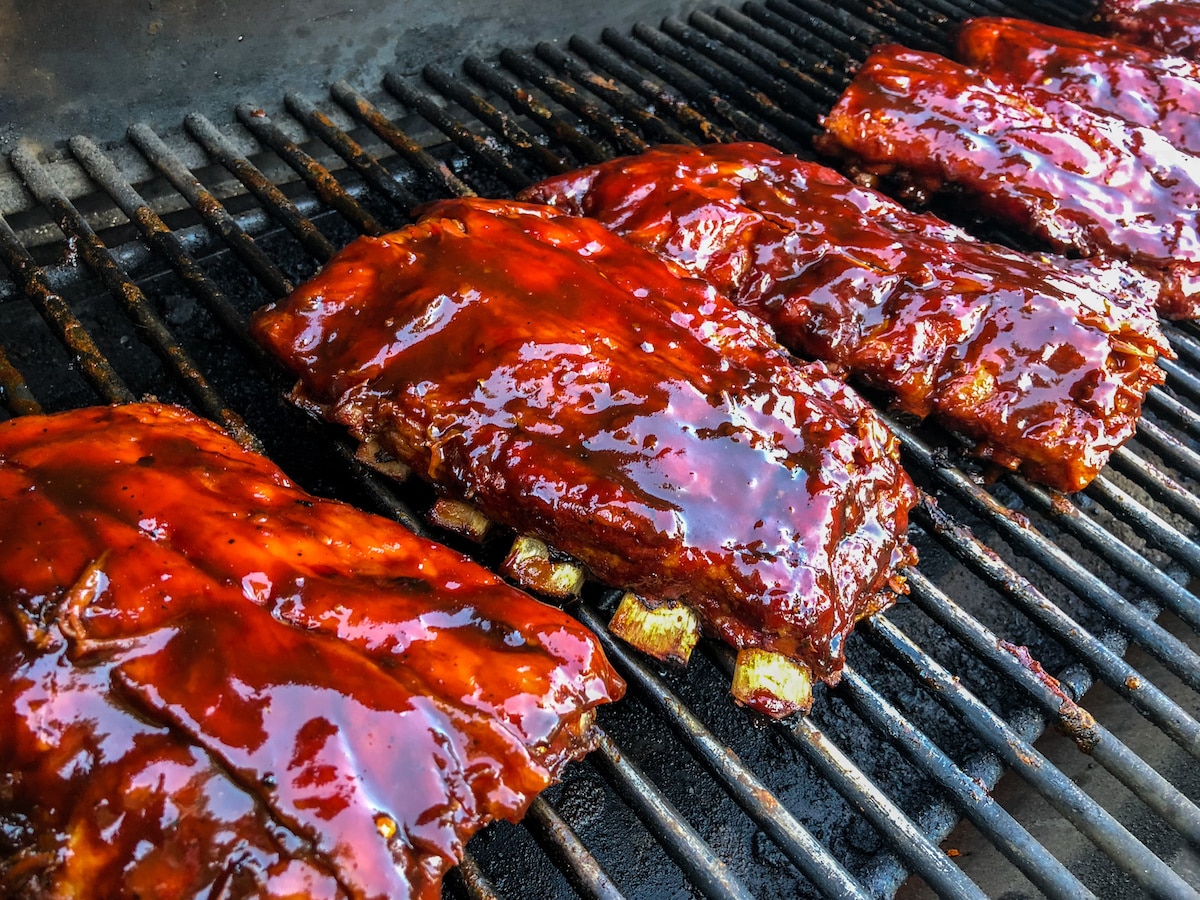
- Don’t baste with barbecue sauce too early. Unless you enjoy a crispier, darker finish to your barbecued chicken, wait until the final minutes before adding BBQ sauce. This is particularly true if the sauce has a sugary base.
Of course, many of the nuances of grilling will depend on the type of grill one is cooking upon.
Different Types of Grills and How to Use Them
There are a lot of factors that can influence the choice of a great camping grill. Propane grills, for example, are more convenient to use than charcoal or wood. They are easy to start and simple to turn off. They come to optimum heating temperature quicker as well. An electric grill like a George Foreman grill or an infrared grill is similarly easy to use and is probably the safest form of grilling. Many prefer charcoal grilling because of the additional flavor that is added in the process. Portable grills like many PK Grill models add convenience and portability when grilling for a small group. Many have terrific memories of camping and grilling out over a wood fire and the smoky flavor it provides.
The type of grill you choose may be affected by initial costs, cost of use, convenience, ease of cleaning and size of the family. Additionally, the use of a grill stand can offset some of the ease of use no matter what type of grill you use. Here is a list of the popular forms of outdoor grills and the benefits and drawbacks of each.
Propane/Gas
Propane grills are the most popular grilling choice on the market today. They are converted to natural gas grills with relative ease, but most prefer the convenience and portability that a propane grill provides.
Propane grills are generally fueled by a 20-pound refillable tank that is mounted in the grill unit. Tanks have a supply valve on top of the tank that should be in the off position when not in use. The tank is connected to the grilling area and burns through supply tubes that connect to the burner controls. These controls allow users to change the amount of gas flowing to the grilling area, and thus the heat level in the grill.
To light a propane grill, the lid or hood of the grill should be open to prevent the build-up of propane gas under the hood. The propane tank supply valve should be turned on at the tank (counter-clockwise).
With a finger on the igniter switch, the burner closest to the igniter should be turned to high and the igniter switch pushed until the burner lights. Once a burner is lit, the other burners should then be turned on and lit, the lid closed and the burners turned to low. It takes about 15 to 20 minutes to fully heat a propane grill to cooking temperature.
Homeowners appreciate the stove-like controls of a propane grill and the wide choice of cooking areas. Many such grills come with options like a second warming rack, side-burner, camping utensil holders and even a rotating electric spit. Some have convenient built-in thermometers and even LED lighting.
One drawback to a propane grill is that they can unexpectedly run out of fuel at an inopportune time. While propane tanks generally can be refilled or traded in for full tanks easily at most hardware or big box stores, buying an additional tank and keeping it full as a spare can be a real meal-saver. Another drawback is that even higher quality grills can have interior parts that are susceptible to rust. While burners, for example, are easily and affordably replaced, getting a grill out of the weather or at least using a grill cover, it can prolong the grill’s life significantly. Make sure that any propane gas grill is fully cooled before storing or covering. When the grill is not in use, the propane should be turned off at the tank as an extra safety step.
Electric
Electric grills are the perfect choice for singles, couples and apartment dwellers. They have smaller cooking areas and are the safest choice for grilling. Electric grills are available in two basic forms: a stand-up unit that resembles a traditional propane grill and a table surface contact grill. Neither has an open flame, but heating elements can get hot. They are extremely efficient and can even deliver those desired grill marks on foods.
Using an electric grill is exceptionally simple. It just needs to be cleaned, plugged in and turned on. Keep plastics away from the radiant heat of these grills. On an outdoor- style electric grill, foods are placed above the heating element. A table surface grill usually has the heating elements built into the cooking surface. Most table-top electric grills like flat-top grills and raclette grills feature a non-stick cooking surface that makes it extremely easy to clean.
Like any grilling choice, you should always keep an eye on the grill when cooking, especially when grilling at high temperatures. Since a table-top electric grill has similarities to frying, there can be spattering when cooking fatty foods, so take necessary precautions.
Charcoal
Charcoal grills have been a favorite in backyards for generations. Although there are premium charcoal grills that price above $500 like most hyper-efficient kamado grills such as the Kamado Joe grill series, they are generally very affordable and portable. The construction of a traditional, affordable charcoal grill is pretty straightforward and simple.
These grills are usually mounted on a carriage with two or more wheels, so they can be moved into position. The body of the grill is designed to hold enough charcoal for at least an hour of cooking time. The sides of the body will most frequently include side vents that can open or close to increase or decrease airflow. The grill grate itself is frequently round to match the grill body, although charcoal grills come in a variety of shapes today, including kettle-style grills.
There are a variety of methods for starting the coals on a charcoal grill. The first step of each involves removing the cooking grate to allow access to the charcoal grate below.
- The Chimney Method. This method involves the use of a smaller metal round chimney to keep charcoal in a more vertical position so the briquettes will get hot faster without the use of a charcoal lighter fluid. The amount of charcoal poured into the chimney will depend on the type of cooking you are doing. For fish, a quarter chimney of charcoal will suffice. For hot dogs or hamburgers, you may want a half-chimney of charcoal. For higher temperatures for longer periods, fill the chimney full. You’ll then need to put an accelerant under the chimney – like a fire starter or newspaper. Once lit, the heat will rise up the chimney from the bottom, quickly starting all the charcoal for grilling in 15 minutes or less. The now-hot coals can be spread on the charcoal grate. After replacing the grill grate, you are ready to cook.
- Pyramid Charcoal and Lighter Fluid Method. Here, you stack the desired amount of charcoal in a pyramid, keeping them touching and as close as possible. Following the label directions on the lighter fluid container, spray the fluid on the charcoals and light immediately. When the coals begin to turn ash white, they are ready to be spread out. Replace the grilling grate and cooking can begin. Do not ever spray lighter fluid on lit or hot coals.
- Using a Matchless Charcoal. Matchless charcoal includes the accelerant and eliminates the need to spray the charcoal with lighter fluid. Simply stack and ignite. Your charcoals should be ready in 15-20 minutes.
People love charcoal grills for several reasons. Some like the throwback appeal of cooking on them. Others like the charcoal smell and flavor it adds to foods. Few, however, enjoy cleaning a charcoal grill. There are ashes and grates to clean, and, of course, ashes to dispose of. Make sure ashes are completely cooled before disposal.
Portable
Portable grills are an amazing way to take grilling on the road without a lot of hassles. Portable grills tend to be smaller and easier to pack up, but can still deliver the fun and flavors of grilling away from home. They are the perfect choice to take on a picnic, to the park or a beach.
Today, there are almost as many portable options of grills as there are full-sized ones. There are small portable propane grills, smaller portable charcoal grills, and even one-time use disposable portable charcoal grills. The advantage of each is affordability and portability. Here are the advantages and disadvantages of each.
Portable Propane Grills. These are an awesome choice for those who want to maintain control of the temperature of their cooking while on the road. Smaller, propane grills use propane tanks in the 16 oz. range that is easily available at any hardware or big-box store. They are easily transportable and offer the opportunity to control the heat through individual burner controls. Many times, these portable propane grills offer both a grilling burner and direct contact grilling option. They are usually constructed to be easily transported.
Portable Charcoal Grills. Portable charcoal grills come in many forms, including small Hibachi grills. These are grills designed to cook for one or two and have minimal grilling space. They are extremely portable and use a minimum amount of charcoal. Bigger versions are available to cook for larger groups of people, but the increase in size and need for a greater amount of charcoal makes them less convenient.
Disposable Portable Grills. One of the most portable, disposable and affordable options in portable grilling is one-time use portable charcoal grills. These are mostly constructed of aluminum pans pre-loaded with ignitable charcoal and a steel or aluminum grate designed for one-time use. You may never cook a rack of ribs or full chicken on these grills, but they can be perfect for hot dogs, hamburgers or bratwursts for an afternoon at the beach or park.
The beauty of grilling is that it is portable and can be enjoyed anywhere. Keep in mind the safety and cooking principals remain the same whether grilling at home or when using a portable grilling option.
Wood
Many believe that grilling outdoors is a way we keep in touch with our cave-dwelling roots. If that is the case, the original fuel for that activity was wood. Wood continued to be the main source for outdoor grilling through the early 1900’s until the invention of charcoal briquettes became the more convenient option. Wood still continues to be favored by many – especially when camping – for brick backyard barbecues and in cooking wood-fired pizzas.
The reason wood maintains its popularity for cooking is that it makes food taste better. Not only can wood add a smoky flavor to foods cooked over it, but the variety of wood available can add different flavors. It is best to choose a wood that has been seasoned, or dried, so it will burn hot and evenly. Superior wood for grilling includes hickory, ash, oak, walnut, and other hardwoods. Avoid pines or other resin-laden wood that can add an odd taste to foods. Cooking over wood that has not fully dried can be frustrating and produce disappointing results.
Cooking with wood is a bit more time-consuming than other options, so plan ahead. To start a wood fire, build a teepee of the wood above your accelerant of choice. It may be fire starters, kindling or other flammable material that will catch fire easily. Once burning, allow the wood to become ash-colored, usually in about 30-45 minutes. At this point, you want to break up the wood into smaller chunks with a shovel or other sturdy, long-handled tool. Once pieces are broken up, they can be spread out. Wood that is burning should be moved toward the back of the pile. Your wood should now be ready to grill over.
Wood fires should be contained by a brick or metal ring, fire pit or other non-flammable enclosure. Be cautious to not build a wood fire under hanging limbs or near structures. Never spray a liquid accelerant on a hot or burning wood fire. It is important to make sure wood fires are completely extinguished prior to leaving them unattended. Pouring water on the ashes and mixing it several times will usually do the job.
Of course, modern innovations have made cooking with wood a lot easier than it has been in the past. When you use a pellet grill such as a Traeger grill or a Pit Boss grill, wood chips are poured into a specially made grill that will smoke and cook the food using wood as a fuel without the issue of grilling with a campfire.
Preparing Your Grill
Whether you are putting together a new grill or getting one ready for its next use, preparing your grill can be as important as preparing your food on it. It can be extremely helpful to read and keep the instructions for the grill and use it for future reference if needed.
Grills should be thoroughly inspected and cleaned at least once each grilling season. This should include using soapy water to make sure there are no leaks. For charcoal or wood grills, old ashes should be removed to improve its effectiveness. On propane grills, grates should be removed so the burner(s) can be inspected to see if they are burning evenly. Depending on the metal your grilling grate is made with, wiping the grate down with vegetable oil after cleaning can help prevent rust. Don’t forget to check your fuel and accelerant to make sure you have a sufficient supply.
Be sure to preheat your grill and grilling grate before cooking to prevent foods from sticking. Finally, cleaning your warm grilling grate after cooking can be easier than waiting before the next meal to clean it.
How to Assess the Temperature
Obviously, the temperature of your grill will impact the grilling process. There are several ways in which you can tell the temperature of your grill. Of course, if your grill has a temperature gauge in the hood, you can check the heat level without opening the grill. If it doesn’t, there are inexpensive thermometers available that can be placed on the grilling grate to monitor temperatures. This, however, requires opening the grill, often losing heat in the process.
Another way to monitor the temperature of a charcoal grill is through what is called the hand test. The premise of the hand test is pretty basic; the longer you can hold your hand over the hot coals, the less heat the coals are producing. If you can hold your hand about six inches above the grilling surface for 8 to 10 seconds, the temperature would be considered low at 250 350 degrees. If you can hold your hand six inches above the grilling surface for 5 to 7 seconds, the temperature is considered medium at 350 to 450 degrees. If your hand can only be held in that position for 2 to 4 seconds, it is likely hot at 450 to 550 degrees. A couple of precautions about the hand test, however. First, it is not always accurate and you’ll want to be careful to remove your hand before it gets burned. You’ll also want to make sure you aren’t wearing loose sleeves that may catch fire when testing the heat level.
How to Grill Meat
Grilling meat may not be rocket science, but knowing more about the best practices can certainly up your grilling game. Knowing how to tenderize tougher, cheaper cuts of meat can pay big dividends. Adding flavor through a variety of seasonings can create exceptional meals. How and when to place the meat on the grill and even when to turn it can make a surprising difference. Even when you remove it and how you serve it will impact its texture and flavor. And don’t forget: Meat will need to be preserved in a quality camping cooler if you’re not planning on grilling right away.
Grilling, like any of the kitchen skills, takes practice and trial and error. Don’t be afraid to try something new and experiment. In this section, we’ll take you through the process each step at a time. It starts with tenderizing.
Tenderize
You can always better ensure a tender meal by buying the most expensive cuts of meats. Most, however, don’t mind putting a little extra effort to save some money by tenderizing less costly cuts. The good news is there are plenty of options for tenderizing meats.
Marinades. Marinades use a chemical reaction between an acidic liquid and the meat to break down tough cuts, making them more tender to eat. Cuts like flank steak or skirt steak are good candidates for marinating. Acidic liquids like buttermilk, lemon juice, and vinegar are effective marinades. Meats should generally not be marinated for more than two hours.
Physical Tenderization. The gentle pounding of some meat with the sharp edges of a meat hammer can be quite effective in breaking down the meat. A similar effect can be achieved by repeatedly poking holes in the cut of meat on both sides with a fork.
Cook it Slowly. There’s a reason smoked and barbecued meats tend to be tender, like when they’re cooked with an offset smoker or smoker grill. They are usually cooked with a “low and slow” approach, using lower temperature over a lengthier period. Cooking foods too quickly can make them tougher than desired.
Sliced Grilled Meats Against the Grain. Meats have long muscle fibers running through them. If they are sliced along those fibers, it will be up to your teeth to chew through them. Cutting these fibers against the grain into smaller sections will make the meat more tender to chew.
You can also help tenderize meat by allowing it to come up to room temperature before grilling and allowing it to rest before serving. Tenderization can also be impacted by seasoning.
Season
There is a wide variety of pre-packaged seasoning blends you can explore to enhance the grilling of meats on a grill. There are those intended specifically for pork, chicken, beef, fish and even those that are more utilitarian. Seasonings can help you achieve a charcoal, Creole or Cajun flavor and an almost unlimited range of other taste sensations.
Sometimes, however, less is better. Backyard warriors have been known to create some amazing grilled meats with as little as salt and pepper. Whether you use just salt and pepper or more exotic blends, pat the meat dry with paper towels before seasoning. Some prefer to add a light coating of vegetable or olive oil prior to seasoning.
It helps to know that salt affects meat in several ways. It draws moisture to the outer surface of the meat. This can provide the crispy grilled crust so many like when grilling steaks or chicken. It also can make meats dry and too salty. For this reason, foods should only be salted immediately prior to grilling. Many cooks prefer coarse Kosher salt to better minimize the salty flavor.
If and when you season with pepper will impact the meat’s flavor dramatically. If you prefer to minimize the heat of the pepper, season the meat before placing on the grill. If you like a little more punch from the pepper, season it right before eating.
Now that the main course of your meal is tenderized, seasoned and up to room temperature, it is ready for the grill.
Place Meat on the Grill and Turn Meat
One of the areas where backyard chefs often fail is the grilling process itself. They may frequently turn foods too soon and too often. To keep foods from sticking to a grill, they should be placed on the hot grill and allowed to cook until they get the distinctive grill marks and “release” from the grill. This should allow the meat to be easily turned with a spatula or tongs. If not cooked to the release point, the meat may stick to the grill and even tear apart when turned. Avoid using a fork when turning so the meat isn’t pierced, allowing juices to escape. When using a barbecue sauce, wait until the last five minutes or so before applying the sauce to prevent burning.
Remove When It’s Almost Done to Liking
One of the challenges for those grilling outdoors is making sure foods are cooked to everyone’s liking. Some may prefer their steaks rare while others prefer well done. While this is largely a skill that will be developed over time, it can be very helpful to understand that meats will continue to cook even after they are removed from a grill. This means that grilled foods should be removed from the hot grilling surface just prior to being done to perfection. This too can take practice and experience. It is also a reason many who are new to grilling tend to overcook meats.
Improve your grilling skills by knowing how to use a meat thermometer to determine how well a meat is cooked. The tip of a meat thermometer should reach into the center of the cut without touching the bone. Meats are judged based on the following:
- Rare: Red and cool in the center with a temperature of 125 degrees.
- Medium Rare: Red and warm in the center with a temperature of 135 degrees.
- Medium: Pink and warm in the center with a temperature of 145 degrees.
- Medium Well: Slightly pink in the center with a temperature of 150 degrees.
- Well Done: No pink in the center with a temperature of 160 degrees.
To avoid contamination, always place cooked meats on a clean plate. Never use the plate previously used to carry the meat to the grill unless it has been washed.
Don’t Forget to Let it Rest Before Serving
Another step inexperienced cooks can make when grilling is not allowing the meat to rest prior to cutting or serving. Resting simply means allowing the meat to sit on a plate and cool down slightly before plating up. This allows the juices to seal into the meat, providing more tender, tastier and flavorful bites.
While it can be tempting to serve sizzling meats right from the grill, this is an example of separating the sizzle from the steak. Don’t sacrifice texture and taste. Allow the meat to rest as the final step prior to dining.
How to Grill Vegetables
If you’ve been grilling meats but have yet to try vegetables on a grill, you are in for some exciting new flavors. Grilled vegetables add a whole new dimension to their taste and texture. You may find yourself loving vegetables that you avoided in the past. When it comes to cooking vegetables on a grill, you can only be stopped by your imagination. New combinations and techniques are available on the grill that you may not be able to get in a kitchen. That familiar smokey aroma takes vegetables to a new flavorful place.
In this section, we will discuss how simple it can be to grill vegetables and the importance of proper cook times. We’ll explore the advantages of cooking veggies on a skewer and the benefits of package cooking. Get ready to add a new layer of flavor to vegetables when grilling outdoors.
Add Light Oil to Vegetables
Even if asparagus, zucchini, and squash aren’t your favorites, they take on a new personality when grilled outdoors. Grilling many vegetables is amazingly simple. Just slice, add some light oil (vegetable or olive) and toss on some salt and pepper.
Grilling vegetables can benefit from the purchase of a vegetable grilling sheet or pan that allows the flames and heat to directly contact the vegetables without having them soak in oil. Many prefer to cook vegetable combinations in chunks or slices. Try making a medley of carrots, green peppers, onions, zucchini, and squash. Grilled thick onion slices with a drizzle of olive oil, salt and pepper make superb toppings for burgers. Add some sugar for a sweeter flavor.
Grilling vegetables is a terrific way to expand your diet and your grilling skills. Explore and enjoy!
Know the Proper Cook Time
Grilling times for vegetable can vary widely depending on their density, how large they are cut and at what temperature they are cooked. A thicker, full carrot will take significantly longer to grill, for example, than grilling some cherry tomatoes. Vegetables of similar consistency will cook at approximately the same times. This can include pairs like onions and peppers, and zucchini, squash and eggplant.
Most vegetables can be cooked to tender in about 10 to 12 minutes. Potatoes, especially whole uncut ones, will take much longer. One of the most efficient ways to reduce cooking time is to cut them into smaller pieces.
Cut Into Smaller Pieces for Faster Cooking
A very simple way to get vegetables to cook quicker when grilling is to cut them into smaller pieces. This is effective whether in cubes or slices. The additional benefits of slicing, cubing or chunking vegetables is it helps the vegetables absorb more of the grilling flavor. The heat penetrates easier and cooks more thoroughly.
You can cut and grill vegetable pieces either separately or combined in a variety of cooking vessels. Don’t forget that you can use your cast iron skillet on the grill. The way you cook vegetables will impact their cooking time and flavor. Here are some of the more popular options.
For Small Pieces, Cook on a Skewer
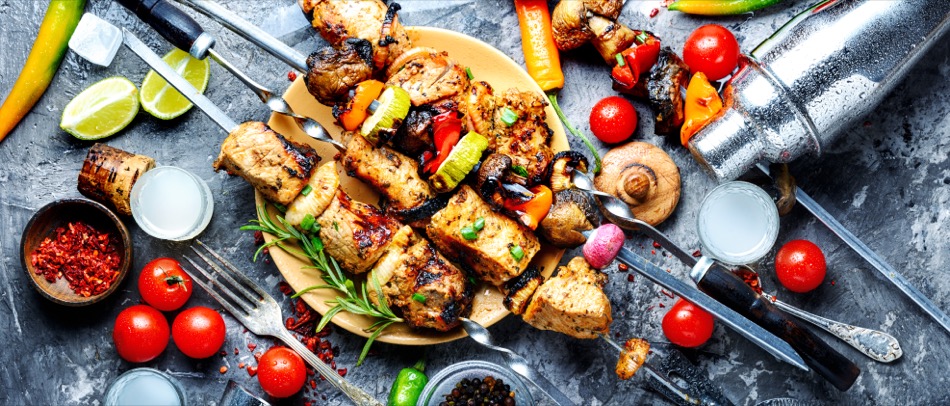
Grilling smaller pieces or chunks of vegetables can be easily accomplished on a skewer. A skewer is simply a long stick or thin rod than can be run through the center of pieces of vegetables, connecting them together in a shish-kabob style for grilling.
When cooking vegetables on a skewer, it is important the vegetables are pierced near the center to ensure they will firmly stay on the skewer. Skewers can either contain an amount of the same vegetables or a variety of vegetable pieces.
Skewers can be infused in flavor with a variety of marinades or oils that will also help to grill them without sticking.
Those interested in skewering a variety of vegetables may include larger chunks or pieces of onion, green pepper, cherry tomatoes, mushrooms and more. An interesting option for grilling potatoes is placing chunks on skewers and coating them in oil or butter and flavored with salt and pepper. Another option for grilling vegetables is placing them in aluminum foil packets.
Cooking in Packets
“Foil packs” have long been a favorite for campers. Simply put, a combination of potatoes and/or other vegetables would be placed in an aluminum foil pack, or envelope, with seasonings and butter or oil. These packets would then be placed above, or in some cases, in a fire for cooking. These foil packs allow for a wide range of errors in cooking and even overcooked packs are often tasty.
Preparation is straight forward. Place large sheets of foil on a countertop and coat with butter, spray oil or light vegetable or olive oil. Add the vegetables you would like to cook and season as desired. Fold the aluminum to create a packet of food that is ready to put on the grill.
Keep in mind, the foil used must either be thick enough or in enough layers to be durable enough to be turned several times while cooking.
Foil packet cooking steams and grills vegetables at the same time. This often results in a tasty, tender side dish that is absolutely delicious. Caution should be taken when opening cooked foil packets as the steam can cause burns.
Cleaning Your Grill
Cleaning your grill affects more than just its aesthetics. Cleaning a grill makes it safer, more efficient and more effective.
There are routine cleanings and there are more extensive cleanings that should occur once or twice annually. Routine cleanings should take place after every use, using a scraper and/or wire brush to remove leftover bits of food, sauces, and grease from the grilling grate. Seasonal cleanings are more detailed and may include some disassembly of the grill itself. These seasonal cleanings also serve as an opportunity to more thoroughly inspect your grill and make any necessary repairs.
There are a variety tools designed specifically for grill cleaning and you have a choice of methods as well. In this section, we’ll take a look at the tools, tips, and tricks to keep your grill functioning at its best and safest.
Equipment for Cleaning Your Grill
The tools needed to clean a grill are easily accessible and affordable. They consist of:
Grill scraper. A grill scraper allows users to effectively scrape residue from the grilling grate and inside the hood. Scrapers can be flat, or some specially designed ones have notches that will better facilitate the cleaning of individual grate wires.
Wire brush. Wire brushes are a must-have for grill cleaning. The wire brushes effectively get in between grates and into corners. Cheap and poorly made brushes may leave thin wires behind, which can be extremely dangerous. After using a wire brush, carefully wipe down the grilling grate to enure any loose bristles have been removed.
Scrub brushes and towels. Your grill cleaning tool chest should also include a scrub brush, coarse hand-held scrubbies and towels or rags to wipe surfaces down.
Burn Method vs Soak Method
Armed with the proper tools, grills can be cleaned using either the burn method or the soak method.
With the burn method, propane grills should be ignited and brought up to temperature. Once hot, the grill should be turned off. After dipping a grill brush in soapy water, the grilling surface should be scrubbed. This can take some elbow grease depending on how much build-up has taken place on the grilling grate. The heat, however, should help loosen debris from the grate, making it somewhat easier to clean.
With the soaking method, fill a large bucket with hot soapy water and place the grilling grate in the water. Let it soak at least 15 minutes and scrub with a grill brush. Rinse, dry, and replace.
Use a Vacuum
Cleaning a grill can be a nasty, dirty and dusty project. A wet/dry vacuum can help make it just a bit easier. While the ashes remaining in a charcoal grill can be easily dumped, propane grills can be more of a challenge. Using a scraper and a grill brush, scrub and chip away at built-up material inside the grill while using the vacuum to remove them. This can be a bit tedious but will pay dividends in safer, more efficient cooking with potentially fewer flare-ups.
Scrub, Wash and Wipe Everything
In some cases, it can be best to simply commit to a thorough cleaning that will involve some disassembly of the grill. The grates should be removed and soaked. The burner element can be removed by taking out a cotter pin or loosening screws where the supply tubes attach to the control knobs. The control knobs can be pulled out for cleaning. If the grill has a viewing window it too can usually be removed for cleaning. Every part of the grill should be scrubbed, washed, soaked and wiped down.
Caution should be taken to avoid chemicals or de-greasers that could either add any unwanted flavor to foods or potentially be toxic. Make sure all pieces are rinsed and dried thoroughly. If the grill may not be used for an extended period after cleaning, the grilling grate should be wiped down with a vegetable oil to prevent rust.
This is a prime opportunity to replace any wearing or rusting parts. Replacing the burner is a far less expensive option than replacing an entire grill.
Final Touches
Putting the final touches on your grill can give it more of a like-new appearance. Clean and shine the wheels. Thoroughly clean the propane tank or the outside of a charcoal grill base. For stainless steel grills, specialized cleaners can help restore its polished finish. If the grilling grate or burner grate has deteriorated, you can likely find replacement parts at a home improvement store or online.
Many end up replacing their grills, even expensive ones, every few years. Properly cleaned, stored and maintained however, a grill should provide many years of use.
No matter the type of grill you decide to use, make sure you take the steps necessary to do it safely. Keep hot grills away from structures, flammables, pets, and children. Keep grills well-maintained and replace parts when worn or rusted. Never store or cover a hot grill and make sure coals are completely extinguished before leaving them alone.
When cooking, make sure foods are prepared safely and to an appropriate temperature. Never baste meats with the liquids the meat marinated in. Only place cooked foods on clean plates and never use the plate raw meat was on without washing it first.
Following safe practices first, the focus can then shift to food quality and techniques to maximize tenderness and flavor. Skills can be improved and knowledge increased to grill foods to near perfection.
The beauty of grilling is that it is a hobby, social activity, and skill all rolled into a process that can be extremely rewarding. It is part art and part science. Of course, the big payoff is the delicious foods that are prepared and the compliments that are sure to follow.
The responses below are not provided, commissioned, reviewed, approved, or otherwise endorsed by any financial entity or advertiser. It is not the advertiser’s responsibility to ensure all posts and/or questions are answered.