
Last Updated on: Jan 26, 2021
To many people, enjoying the great outdoors means stepping away from the comforts of home. However, just because you’re away from civilization doesn’t mean you can’t have a good cup of coffee. With the right equipment and a little knowledge, you can have the perfect cup of coffee every morning. In this piece, you’ll learn how the right grind, clean water, and proper ratios can help you prepare a good cup of coffee even while you’re away from it all.
What We'll Cover
- The Beans
- Buy Fresh Roasted Beans
- Roasting Your Own
- Choosing the Right Beans
- Bean Storage
- Grinding: Coarse Versus Fine
- The Water
- Coffee Chemistry
- The General Setup
- Common Brewing Methods
- 1. Pour Over, Mug Filter and Steeping
- 2. French Press
- 3. Percolator
- 4. Espresso
- 5. Cowboy Coffee
- 6. Instant Coffee
- If You’re Feeling Fancy
- Enjoy!
The Beans
Before you start brewing coffee in your camping coffee pot, you’ll need to set yourself up for success. Beans are the foundation of any good cup of coffee. Prepare for your time in the woods by purchasing the perfect beans for your camping trip and storing them properly. Buying beans shortly before leaving will help ensure quality and freshness. Hopefully you already have a favorite source for coffee beans at a store near your home. If not, start looking well before you’re scheduled to leave and ask them when they roast their beans.
Buy Fresh Roasted Beans
Beans are at their freshest a few days after they’re roasted—and many recommend using beans within two weeks of roasting. They will not “go bad” after two weeks, but they will lose some flavor. Pay attention to the packaging when purchasing coffee. Vacuum sealed bags with one-way air valves are considered best. Steer clear of coffee suppliers that sell their beans in clear plastic, as light can damage beans.
When making your purchase, ask when the beans were roasted. The best suppliers will roast beans on site, so they’re as fresh as possible. If your coffee supplier purchases the beans pre-roasted, look for the roast date on the bag.
Roasting Your Own
If your local coffee supplier doesn’t have fresh roasted beans, you can bypass this problem by roasting your own. To roast your own coffee beans, you’ll need unroasted beans, a stove-top manual crank popcorn popper. An alternative would be a quality skillet — you’ll just have to make sure you don’t spill. Put the beans in, turn on the heat to a medium-low temperature, and use the crank to stir.
As the beans begin to roast, you’ll hear them making subtle cracking noises. The first crack comes at around 3 to 5 minutes in the roaster. The second crack comes a few minutes after the first. When the second crack occurs, the bean is considered medium-roasted. If the coffee is left on the roaster for too long, the resulting coffee will be watery, thin, and burned.
A few tips:
- Stir the beans constantly while roasting.
- Roast at a temperature between 350 and 500 degrees Fahrenheit.
- Take the beans off the heat shortly after the second crack.
- Never leave the popcorn popper unattended.
This will likely take a good amount of practice before you feel confident in your roasting skills. If your excursion is imminent, but you’ve never roasted your own beans before, it may be easier to simply buy pre-roasted beans. Alternatively, you may also consider roasting your coffee beans in a camping oven. Some may actually prefer this method.
Choosing the Right Beans
Arabica vs. Robusta
In general, there are two types of coffee beans sold on the market: Arabica and Robusta. Arabica beans are widely believed to be the better type of bean, with a more complex flavor. Compared to Robusta, Arabica beans are mildly sweet, with fruity undertones, and higher acidity. Others should not dictate your preferences, though. Find the coffee you like best and stick with that.
Robusta coffee is a simpler coffee with less flavor (attributed to the differences in lipids, sugar, and caffeine content of each bean). These beans come from a relatively easy to maintain plant, so the coffee tends to be cheaper.
Roast Type
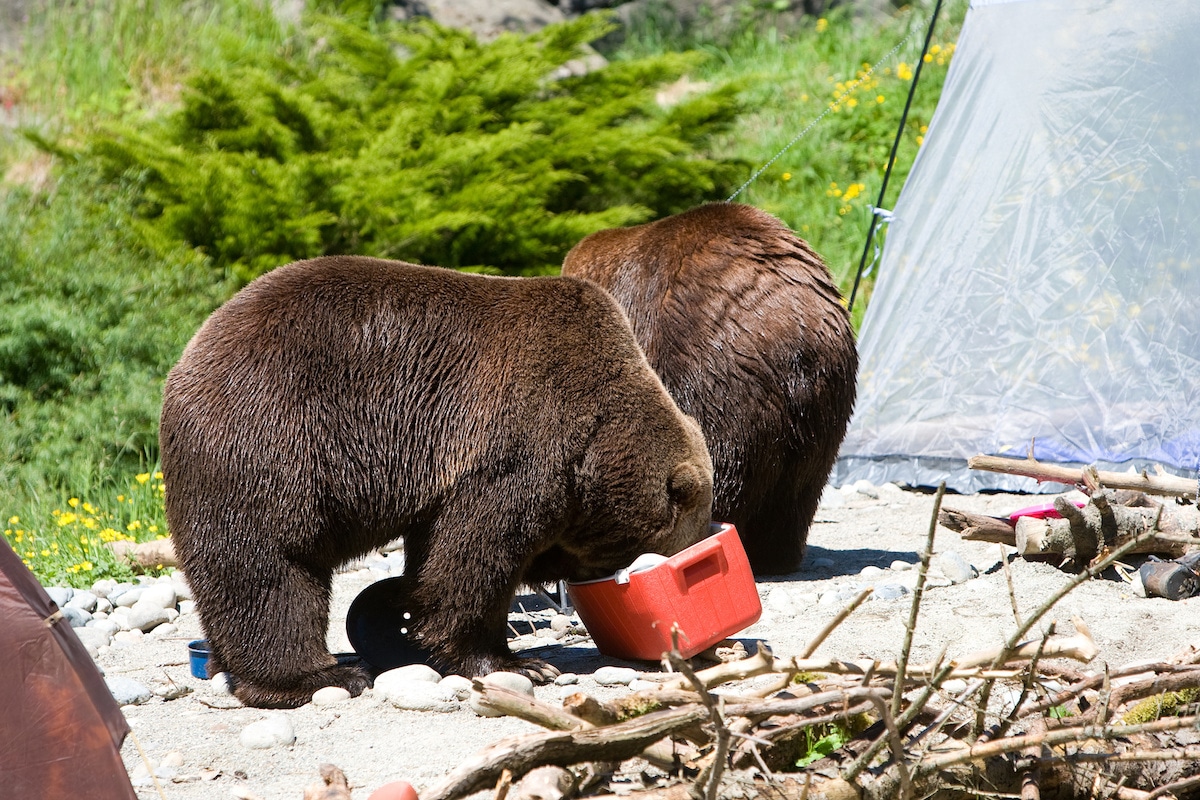
The longer the coffee roasts, the darker the bean will be. Darker roast produces more aroma outside, which some people prefer. Roast type depends entirely on preference. If you’re not sure whether you like a darker or lighter bean, experiment with different roasts before picking the one that’s right for you. However, make sure you’re using a bear canister to store your coffee, as strong food smells can attract dangerous animals. You can also use a coffee thermos to keep coffee warm while you’re exploring the outdoors.
Other Considerations
In addition to roast type, there are other considerations to weigh when deciding what type of beans to buy.
- USDA Organic. This label indicates that the coffee bean has been produced via methods that are approved as organic by the USDA.
- Country of origin. Soil type, climate, and other environmental factors affect the flavor of the beans; different countries produce coffee of different flavors.
Ultimately, the type of bean you purchase depends on your personal preferences. If you want to make a hobby of coffee brewing, buy different beans and experiment. Keep a log to help you remember your first impressions. Become a connoisseur of bean types.
Bean Storage
The way coffee beans are stored can have a big impact on their flavor. Good storage techniques make for better coffee, and longer-lasting beans. As already mentioned, air and light both have a negative impact on coffee beans. Humidity can be damaging as well, so avoid beans in the refrigerator or freezer.
Storing at Home
Many coffee aficionados store their beans in air-tight glass containers in a dark pantry. Consistent, normal room temperatures help keep beans fresh, so storing them in a cool dark place is important.
Wilderness Storage
In the wilderness, glass containers can be a liability. For backpacking and camping, the best coffee bean storage containers are non-breakable and airtight. These containers help keep moisture out, and protect the coffee from exposure to daylight. When hiking or camping in cold weather, keep the beans protected in a warm part of the backpack, close to the body.
Grinding: Coarse Versus Fine
Whole coffee beans retain oil much better than ground up beans. You want the oil to stay in the bean for maximum flavor and freshness, so consider not grinding the beans before leaving on your trip and bring a coffee grinder with you.
When looking for the best travel coffee grinder, your first instinct may be to purchase a battery operated blade grinder. Some of these grinders produce grounds of uneven sizes, which can negatively impact the flavor of the coffee. Burr grinders are often considered best. You can find portable, hand-crank operated burr grinders in coffee stores. Purchase a product that adjusts for coarseness, so you can pick the right kind of grind for you.
Fine grind coffee is rich and flavorful, like Turkish coffee and espresso. Coarsely ground coffee has a smoother flavor. Sometimes undesirable qualities that manifest in the flavor can be traced back to the grind. Bitter coffees may be ground too fine, while a flat flavor could indicate the coffee was too coarse.
Some people are surprised to learn that the coarseness of the grind also affects the caffeine content. Coffee that is coarsely ground will have less caffeine than coffee that is finely ground. For people seeking a strong cup of coffee in the morning, a fine grind is most appropriate.
A word of caution! Grinding your coffee outdoors can have hazards, especially in high wind conditions. Grind coffee in a sheltered location, or grind coffee into a container like a baggie attached to the grinder opening. This prevents the coffee from blowing away or getting wet while it’s being prepared.
The Water
Many people fail to consider how water affects the flavor of their coffee. Water contains minerals and chemicals that can impact the coffee’s overall flavor profile. Knowing where the water comes from and choosing water from a good source can impact the quality of the coffee. Temperature of the water also affects the flavor, so take all of this into consideration when selecting water for your morning brew. Bring water in a hydration bladder or other hydration reservoir to ensure the water is to your standards.
Cleanliness and Odor
Water cleanliness is an important consideration when camping. Water found in streams and rivers can be dirty, polluted, or may contain harmful biological agents. Not only does this make your coffee taste bad, it can also make your coffee harmful. Water odor is another problem that you may encounter while camping. While odors are not necessarily a sign of a toxin, they definitely get in the way of your coffee enjoyment.
You can solve this problem by carrying bottles of water (not distilled or purified). If carrying water isn’t practical, buy a water filter for use in outdoor situations like camping.
Remember that water that smells in the bottle or in the cup is not good to use for making coffee. To find the best water for your coffee, examine the water, sniff the air around the water, and consider its source before brewing a cup.
Water Hardness and Softness
Water that contains minerals like magnesium and calcium (i.e., hard water) will absorb the flavors of the coffee more readily than soft water, which lacks these minerals. If the water you bring with you on your camping trip comes from your tap, the normal hardness or softness of your water will have an effect on how the coffee tastes.
If you use bottled water to brew your outdoor coffee, you may notice a change in flavor compared to the coffee you normally make at your home. If you’re usually very satisfied with the way your coffee tastes, bring that same water from home to make your outdoor coffee.
Water Temperature
The process of combining hot water with ground coffee to produce a brew is sometimes referred to as extraction. The hotter the water, the faster the extraction of coffee flavor and caffeine. Hydrolysis is a chemical reaction that occurs during extraction. During hydrolysis, water reacts with another compound to break it down. This process of extraction and hydrolysis is the very root of what happens during brewing.
In general, the ideal water temperature for promoting extraction is between 195 and 205 degrees Fahrenheit. Many automatic countertop coffee brewers operate between these temperatures. Brewing coffee at this temperature takes between 2 to 4 minutes. However, if you’re brewing coffee outdoors over an open flame or on a camping grill, maintaining a consistent temperature may be more difficult.
Some recommend the boil and pour over method, which requires you to boil the water first and then pour the water over the coffee grounds to create your coffee. Note that water brews at a lower temperature in higher elevations. Water boils at 212 degrees Fahrenheit at sea level, but the temperature at which water boils lowers by about 1 degree for every 500 feet increase in elevation.
What does this mean for coffee brewing? If you’re making coffee at a higher elevation, the water may need to steep longer over the coffee. If the finished product seems weak, this may have something to do with the boiling temperature.
The temperature at which coffee is consumed depends entirely upon personal preference. Some people like their coffee has hot as possible, others prefer a cooler coffee.
Coffee Chemistry
Brewing good coffee outdoors is both an art and a science. Understanding how water temperature, water quality, bean quality, and process come together to form the drink you crave can help you perfect your method. If your process is good, the coffee you drink will be sweet, aromatic and complex. If the process is wrong, your coffee will be bitter. Here’s what you need to know.
Process of Extraction
Poorly extracted coffee tastes bad. You can tell when your brewing process is going wrong by noting the flavors and the quality of the coffee. Under-extracted coffee may taste sour or salty. It has a quick finish and a notable lack of sweetness. Over-extracted coffee is bitter, dry, and an overall unpleasant experience.
Water temperature and timing plays a vital role in the process of extraction. Under-extracted coffee needs a longer brew time, while over-extracted coffee should be brewed for less time.
When brewing coffee outdoors for the first time, make a note of how long you allowed the extraction to take place. Take a drink of the coffee and note the various flavors and effects in your mouth. What adjustments do you need to make in order to produce better results? The next time you brew coffee adjust the extraction time accordingly.
Ratios
The coffee to water ratio has a big impact on the coffee’s flavor. While there’s no magic number or ratio that works in every circumstance, the generally accepted ratio for pour over coffee is approximately 1 gram of coffee for every 15 to 18 milliliters of water. Less water produces stronger coffee, while more water produces slightly weaker coffee.
This ratio can change dramatically depending on the method being used to produce the coffee. French press coffee, for example, requires about 11 to 17 milliliters of water for every gram of coffee, while cold brew requires approximately 5 to 8 milliliters of water for every gram of coffee. Espresso might range anywhere from a 1:1 to 1:4 ratio of grounds to water weight.
Getting exact measurements can be hard in the wilderness unless you have exactly the right dequipment. Bring a non-breakable measuring cup to help you determine exactly how much water is needed to make your cup of coffee, and measure the exact amounts of coffee in advance. Place each individualized portion of coffee into baggies, so you won’t have to weigh the coffee out in the woods.
The General Setup
Making coffee (or any kind of food or drink, for that matter) in the woods or along the hiking trail is much harder without a fully stocked camping kitchen or good cooking tools and cookware that are properly cleaned. Choosing the right type of tools is also important. Some equipment is hard to lug around while others just don’t work as well outside as they do inside. Testing your tools in advance and giving careful thought to what you bring can help make the experience of brewing coffee outdoors easier and more enjoyable. Also, having a good, sturdy camping table will make this whole process MUCH easier and stress-free (you only have so many hands to hold things, you know?).
Coffee Brewing Equipment
Have a detailed plan in mind for the type of coffee you want to brew and how you want to brew it. Know exactly what tools you want to bring. Luckily, the bare minimum of what you’ll need to brew coffee will be included in a camping mess kit. The outdoor coffee making process typically does not involve electricity, so you may need to adjust your coffee making methods for outdoor brewing. Make a list of every tool that you’ll need to brew coffee outside. Don’t forget small tools like your thermometer or your coffee scoop. You’ll want a quality camping coffee pot or brewing apparatus as well. Once you have a comprehensive list, clean all the equipment before packing it away in your backpack.
Dry the equipment after washing to avoid staining your clothes, tent or other items packed away with your coffee tools. Most important, don’t forget a camping mug with which to drink the coffee. Unless you’re planning to drink cold brew coffee on the trail, the coffee mug you choose should have a handle to prevent you from burning yourself while drinking.
Factors to take into consideration when choosing the tools for outdoor brewing:
- The bigger the tools, the more inconvenient they’ll be to drag around.
- Reducing the number of tools you need makes set up and clean up easier.
- Breakable tools, like ceramic mugs, can be a hazard on the trail.
- Lightweight tools, like tin mugs, make traveling easier.
It’s best practice that only clean and dry coffee equipment should be packed away.
Grinder
The grinder you use to grind up your coffee can have a big impact on your coffee’s flavor. In general, there are two different types of grinders available on the market. A burr grinder, also sometimes called a mill grinder, uses two plates with burrs to crush the coffee beans. Burr grinders are preferred over blade grinders because they produce grounds that are even in size and consistency.
A blade grinder uses fast moving blades to chop the beans into small grounds. Friction between the blades and the beans heats the grounds during the grinding process, which can have a negative effect on the finished product. Also, the uneven size of the grounds means that some grounds may be under extracted while other grounds may be over extracted, resulting in poor tasting coffee.
In the wilderness, blade grinders have another problem as well: they’re very loud. Blade grinders work because they’re fast. You can find battery operated blade grinders to bring while camping, but you’ll be disturbing the natural world around you.
Plan to bring a manual crank burr grinder with you on the trail. Burr grinders are quiet and they produce some of the best coffee in the world.
What happens if you’re about to leave on your camping trip and you have no portable burr grinder to bring along? A mortar and pestle or a roller (if the beans are kept in a bag) could do the trick, although many find it hard to grind their coffee evenly with this kind of tool. Don’t anticipate great results with either tool, but you’ll be able to get by. If both seem like a bad choice, grind your coffee in advance of your trip.
Heat Source
Unless you’re planning to take a battery-powered electric kettle or battery operated coffee maker on the trip, you’ll need a proper heat source on the trail. Campfires are fun and effective for boiling water and making coffee, but many people choose to bring alternative equipment for their camping and cooking needs. Camping stoves can be an important tool if you’re trying to cook in the rain or if you want to heat up some coffee but you don’t want to go to the trouble of setting up a campfire.
The best camping stove for you should depend on how many people you’re traveling with and how much hiking you’ll be doing. This is a personal choice. Whatever stove you bring along, know the fuel requirements and bring however much you need to cook and make coffee. If it’s going to be cold out, you may opt for a quality tent stove instead of something meant for the outdoors.
If you’re planning to heat up your pot of coffee over a fire, it’s helpful to know something about camp fires before getting started.
Campfire Tripods
A campfire tripod is a metal tripod that hangs items over the fire. The pot or camping kettle dangles from this tripod into the fire. There are a number of different styles of tripod, from cast iron to aluminum, or with or without grill attachments. You’ll have to find a configuration that works for you based on your needs.
Griddle and Trench
Portable camping griddles can be positioned over the campfire so multiple pots and pans can be placed over the fire at once. Griddles are best placed over trench fires (a fire that has been built in a pit).
If you don’t have a griddle, balance a wide flat rock on other rocks around the pit. Heat the rock and then place your pots and pans on the rock. This is a slow way of cooking, but effective. Finally, if there are no flat rocks in the area, you can also place two sturdy branches over the fire pit and set the pan on top of the branches.
Either way, the most important thing to remember is to keep the fire small. A small fire is easier for cooking, and is often safer as well.
Common Brewing Methods
There are many methods for brewing coffee. People who feel especially passionate about coffee often have different kinds of camping coffee makers around the house for different circumstances. If you’re one of those people, you may have several tools to choose from when it comes to making your own coffee.
Most important to consider is the practicality of each brewing method on the trail. In general, tools that are heavy, fragile, breakable or clunky are not good for camping. If you don’t have a portable tool at your house for making coffee, then you may need to buy something special just for your time in the wilderness.
1. Pour Over, Mug Filter and Steeping
Pour-over coffee makers are one of the most popular devices for making coffee at home. If you prefer pour over coffee, you have quite a few options on the trail.
a) Pour Over
Tools needed:
- Cone-shaped funnel
- Coffee filter
- Mug
- Pot
- Water
- Coffee grounds
Several camping companies make cone-shaped funnels that easily hold cone-shaped coffee filters. To use these devices, simply insert the coffee into the filter, slip the filter into the funnel, and place the open end of the funnel over the mug. After heating the water to the desired temperature (see above), slowly pour the water over the coffee in the filter. Allow some coffee to drain out of the cone before pouring more coffee in, to prevent the water from overflowing the cone.
- Simple to execute
- Few tools needed
- Coffee tastes similar to pour over coffee from home
- Good for a single cup
- Less efficient when trying to prepare a large batch of coffee for several people
b) Steeping Method
Tools needed:
- Bag-shaped filter
- Mug
- Pot
- Water
- Coffee grounds
Similar to the pour over method, the steeping method uses a bag-shaped filter, similar to a tea bag. Simply insert the coffee into the filter and allow the water and filter to steep together for the desired amount of time.
In a pinch, you can even use a handkerchief as a filter. To do this, place the coffee in the center of a freshly laundered handkerchief, tie up the handkerchief to prevent the coffee from staining, then slip the handkerchief into the hot water.
- Simple to execute
- Few tools needed
- Coffee tastes similar to pour over coffee from home
- Good for a single cup
- Less efficient when trying to prepare a large batch of coffee for several people
2. French Press
Tools needed:
- Travel French press
- Mug
- Pot
- Water
- Coffee grounds
The French press is a simple tool that works well when camping, provided that you have enough space to bring one with you. To use the French press, simply pour coffee grounds into the coffee maker, then pour heated water on top. Allow the water and coffee to steep for the desired length of time, then depress the plunger to separate the coffee and water.
- Simple to execute
- Few tools needed
- Larger models can serve more than one person at a time
- Large and clunky
- Glass French press models can be easily broken
3. Percolator
Tools needed:
- Percolator
- Paper filter
- Mug
- Water
- Coffee grounds
Most camping percolator coffee pots are made from lightweight metal that can be easily attached to the outside of a backpack. Percolator coffee can often be bitter because it’s made from boiling water, but if you’re used to using a percolator at home, you’ll probably enjoy just as much on the trail.
To use the percolator, fill the chamber with water, insert the paper filter into the filter basket, then pour the coffee grounds into the basket over the filter. Assemble the percolator, then allow the percolator to sit over the fire until the water begins to boil. Allow the water in the percolator to boil for the desired length of time, then serve the coffee.
- Few tools needed
- Many percolators are durable and lightweight
- Larger models can serve more than one person at a time
- Takes practice
- Easy to over-extract
4. Espresso
Tools needed:
- Camping espresso maker
- Pot
- Water
- Coffee grounds
Serious espresso makers tend to be large, complex machines that cost hundreds or even thousands of dollars. It surprises many coffee drinkers when they discover that portable espresso makers do exist. Using a pump to push water through the coffee grounds, portable espresso makers are compact, lightweight and require no battery or electricity to operate.
Operation of these devices may vary depending on the design and the brand, whether you use a Coleman coffee maker, a Stansport coffee maker, or any other brand of machine.
Here’s an example of one procedure for using a travel espresso maker:
- Heat water in a pot over the fire.
- Place the coffee in the basket.
- Fill the chamber with hot water.
- Assemble the espresso maker.
- Hold the espresso maker over a cup.
- Depress the pump several times until espresso emerges from the opening in the espresso maker.
Different products may work slightly differently. If you’re serious about wanting espresso with you on the trail, try different products until you find the kind that works for you.
- Lightweight
- Designed for portability
- Simple construction
- Some people may prefer traditional coffee rather than espresso
- Typically these only make single servings at a time
5. Cowboy Coffee
Tools needed:
- Pot
- Water
- Coffee grounds
- Mug
Cowboy coffee is the quintessential coffee that people drink while they’re out camping, and all it takes is a solid cooking pot and a fire. It’s imprecisely made and the end result tends to have more than a few coffee grounds floating in the brew. You can think of cowboy coffee as French press coffee, but without the plunger.
Here’s the process for making cowboy coffee:
- Heat water to boiling in a pot.
- Add coffee grounds to the water.
- Remove from heat.
- Allow grounds and water to steep for approximately 4 minutes, or until the coffee reaches the desired flavor.
- Pour the coffee gently into the mug, without disturbing the grounds at the bottom of the pot.
- Simple process
- Can be made without any specialized tools
- Difficult to predict results
- Coffee grounds will find their way into the finished product
6. Instant Coffee
Tools needed:
- Pot
- Water
- Instant coffee
- Mug
- Spoon
Instant coffee is not usually considered an acceptable beverage for coffee aficionados. Even so, some high-quality instant coffees can do the trick for someone in a pinch. In the wilderness after a rather unsatisfying sleep in a sleeping bag, a hot cup of instant coffee may seem heavenly, regardless of its source.
The process:
- Heat water in a pot over the fire.
- Pour instant coffee into the mug.
- Pour hot water over the coffee grounds.
- Stir.
- Simple to prepare
- Requires no special equipment
- Some types of instant coffee are tasty
- Little control of the coffee’s overall quality
If You’re Feeling Fancy
Not everyone enjoys coffee in a rich, black form. Without milk, sugar or other flavorings, some will pass up the opportunity for coffee altogether. If you’re the camper who brings a camping utensil set and measuring cups along, this may be for you. Then again, who wouldn’t want to drink gourmet coffee while lounging on their camping cot. People who want their drinks sweet and richly flavored can have their coffee and love it too, even while they’re out in the woods. There are a variety of products on the market that make this possible.
Some of the most basic products that are easy to bring while camping include:
- Powdered milk
- Cinnamon
- Cocoa powder
- Sugar
- Coconut oil
- Vanilla extract
Just having these products on hand makes it possible to enjoy a sweet, satisfying cup of coffee every morning while you’re away.
Frothing Milk for an Outdoor Cappuccino
If all you want in the morning is a warm, well-made cappuccino, you can make that happen. Of course, you’ll need to use a milk frother to froth the milk first. Frothing milk is a relatively simple process, even without the right tools. For many people, the biggest obstacle standing in the way of well frothed milk in the wilderness is the lack of milk itself. The longer a trip becomes, the less realistic this option becomes. However, if you’re camping with ice, the best camping cooler, and a container of milk, the process is relatively straightforward.
Process for frothing milk:
- Pour milk into a jar and shake vigorously for 30 seconds until it starts to froth.
- Pour frothy milk into a pot and heat it until it is gently boiling.
- Stir the milk gently.
- Boil until a good froth is forming at the top of the milk.
- Remove the milk from the flame.
- Spoon the froth into the coffee.
Avoid boiling the milk for too long or the froth will fall flat.
Tips for Roasting Beans Outdoors
If you’re dedicated to drinking coffee from freshly roasted beans, bring a manual crank popcorn popper or pot with you to the campsite. Most popcorn poppers are not small, so this is only an option if you’re car camping (i.e., you arrived at the campsite in a car rather than on foot).
Follow the same procedure for roasting your beans that you would use at home: pour the beans into the popcorn popper, hold the popper over the fire, and turn the crank to stir the beans. Roasting beans over a campfire may take longer or less time than you’re used to when roasting your beans at home. Listen and watch for the first crack and second crack to determine when the beans are done.
Enjoy!
A good cup of coffee can be enjoyed just about anywhere. With the right tools, smart planning, and some creative thinking on the trail, you can have a good cup of coffee before your next hike through the wilderness. No doubt doing this will help you enjoy your time spent camping even more.
The responses below are not provided, commissioned, reviewed, approved, or otherwise endorsed by any financial entity or advertiser. It is not the advertiser’s responsibility to ensure all posts and/or questions are answered.