
Last Updated on: Jan 22, 2021
There are a variety of situations where a family could find themselves without power over the course of days or even weeks. Hurricanes, earthquakes, blizzards and other natural disasters are some examples. Potential loss of large sections of the power grid is another. There are those who find it prudent to prepare in the event of civil unrest. Whatever the reason, loss of power and water and limited access to food can cause immediate negative impacts.
What We'll Cover
- Preparing an Emergency Food Supply
- Non-Perishable Foods to Keep in Your Pantry
- Shelf Life of Stored Foods
- Storage Tips
- What Foods to Buy Right Before an Emergency
- Water Supply
- Food Safety and Sanitation in an Emergency Situation
- How to Cook Without Power
- Cooking Supplies
- Make Ash Cakes
- Cook with Foil
- Use Spits and Skewers
- Try a Solar Oven or Reflecting Oven
- Canned Heat
- Camping Stoves
- Rocket Stoves
- Car
- Additional Advice About Food in Emergency Situations
- Remember, Preparation is Key
Those who consider how they would handle a prolonged power outage are certainly going to be better prepared than those who do not. In this guide to Emergency Food: Eating and Cooking without Power, we’ll examine how a family can prepare an emergency food supply and what non-perishable foods to keep on hand. We’ll look at food storage tips and the shelf life of foods. We’ll suggest what foods to buy right before an emergency.
We’ll review best practices for keeping an emergency water supply and potential sources for water in an emergency. This guide will address food safety and various ways you can cook food without power.
You may never be faced with an emergency situation where you are required to eat and cook without power. It can be comforting, however, knowing when faced with such a situation, you and your family will be better prepared.
Preparing an Emergency Food Supply
Preparing an emergency food supply doesn’t have to be expensive or time-consuming. It can actually be accomplished gradually, over the course of your routine shopping trips. The fact is, you may already have a supply of canned and packaged goods that can serve as a start to accumulating an emergency food supply.
When preparing an emergency food supply, there are a few things to keep in mind. While you may never need that much, the Red Cross recommends a two-week supply of emergency food. You’ll also want to keep in mind the food needs of the various members of your family. This includes adults, children, toddlers and babies and even pets. Make note of any allergies that may impact consumption.
While foods should be high in calories and nutrition, you’ll also want to include foods the family enjoys. Choose foods that do not require refrigeration, water or special preparation. Foods that require limited or no cooking are best. Keep in mind that in an emergency situation where power is out and food and water is limited, there will be other challenges as well. Try to keep meal preparation simple and choose foods accordingly.
When preparing an emergency food supply, special attention should be paid to expiration dates. Use older foods in your normal daily food preparation and replace with foods with an extended expiration date. Rotate your stock of emergency foods regularly, keeping emergency foods within expiration or “best used by” dates.
Non-Perishable Foods to Keep in Your Pantry
Non-perishable foods that are perfect for an emergency supply are foods high in protein and energy. They are usually found in cans, jars, boxes, bags and/or packets and should be easy to prepare. A list of sample nonperishable foods may include:
- Peanut butter. This may be as close to the perfect emergency food as possible. Peanut butter has a long shelf life, is resealable and contains high amounts of protein. It also can be consumed in a variety of easy ways, including on crackers, bread and straight out of the jar.
- Canned fish. A variety of canned fish can be eaten directly out of the can with little to no preparation. This variety includes tuna, salmon, sardines and others. Canned fish can have a shelf life of up to two years. There are also sealed packet options; however, they have a shorter shelf life.
- Canned meats. Like canned fish, canned meats can be consumed directly from the can with no preparation. Your local grocery store is likely stocked with canned meats, including chicken, turkey and even sausages and sliced beef. Many of these meats are available in sealed packets as well, but also have a shorter shelf life.
- Canned vegetables. Choose from a variety of vegetables to suit your tastes and nutritional needs. Select peas, carrots, corn, green beans, asparagus and others, or include some cans of mixed vegetables to simplify your stock.
- Soups and chili. Soups are a great way to add variety to an emergency food supply. The choice is almost endless, ranging from simple stocks and broths to chicken noodle and vegetables and beef varieties. Chili is also a nice option, especially for those who live in cooler climates.
- Nuts, trail mix and granola bars. These foods are a terrific way to add protein, fiber and variety to an emergency food diet. Nuts, in particular, are a superb source of protein.
- Crackers and dry cereals. While dry cereals and crackers can be a challenge to store, they are valuable in an emergency food supply. They can be consumed separately or used with other ingredients to create more imaginative meals.
- Dried fruits. From raisins to apricots, bananas and apple chips, dried fruits are a superb way to add flavor and serve as a treat. Dried fruits, when properly stored, are long-lasting and a great source of energy.
- Powdered products. Any emergency food supply can benefit from a variety of powdered food products available. These include powdered milk, eggs, and instant potatoes.
With a little imagination, one can create a surprising menu using non-perishable food items packed with vitamins, energy, and nutrients.
Shelf Life of Stored Foods
Due to the difference in make-up and packaging, foods in an emergency food supply will have varying shelf lives. Managing these shelf lives is an important element in maintaining a safe emergency food supply.
Here are some general guidelines when it comes to emergency food supply shelf lives.
Foods That May Be Stored Indefinitely (Under Proper Conditions)
- Dried beans
- Instant coffees and teas
- White rice
- Dry pasta
- Dried wheat & corn
- Bouillon
- Salt & seasonings
Foods That Should Be Used Within a Year
- Canned meats and fish
- Canned fruits
- Canned vegetables
- Peanut butter & jelly
- Cereals
- Hard candy
- Canned nuts
Foods That Should Be Consumed Within Six Months
- Dried fruit
- Crackers
- Powdered products
Of course, the key is always paying attention to expiration or “best used by” dates when deciding when a food product should be kept or consumed.
Storage Tips
Your emergency food supply, ideally, should be stored in an area that is cool, dry, and dark. Heat, sunlight and moisture are the enemy of most food products, including non-perishable ones. Once a package of non-perishable food has been opened, make every effort to reseal it in a jar or resealable bag from which the air has been removed. Once a perishable food product has been exposed to the air, its shelf-life diminishes substantially, so it should be moved closer to the front of your emergency food rotation. Label all containers properly. Dating them when they were opened and resealed can help instill confidence in the safety of your emergency food supply.
What Foods to Buy Right Before an Emergency
Building and maintaining your non-perishable emergency food supply can be done over weeks and months. They will be ready and in stock for you to use when an immediate emergency occurs. There are circumstances, however, when you may have notice of a potential impending disaster such as a hurricane or blizzard. You may not feel the need to grab a survival kit for these scenarios, but preparation is important all the same. In these instances, it can be very beneficial to make a trip to your grocery store for more perishable supplies that can supplement your nonperishable items. Here are some items to consider stocking up on when an impending disaster may be on the horizon.
Citrus Fruits
Citrus fruits such as grapefruits, oranges, lemons and tangerines are a superior source of vitamins like vitamin C. When kept cool, citrus fruits can last weeks and can be used to flavor other foods and even enhance plain drinking water. Citrus fruits are healthy and refreshing.
Apples
For a fresh fruit, apples have an extraordinarily long shelf life, up to three months or more when kept in a dry, cool space away from other fruits and vegetables. Apples are nutritious, good for digestion and high in fiber.
Root Vegetables
Root vegetables like potatoes, yams, carrots, onions, beets, turnips and others can last surprisingly long in a cool, dry environment. This makes them a good choice to supplement nonperishable items when there is an approaching storm.
Hard Packaged Meats
While the shelf life of lunch meats may be short, hard packaged meats like pepperoni, hard salami, summer sausage and others can last for weeks. This is a good alternative for those who may not be looking forward to a diet of canned meat and fish.
Of course, most fresh fruits and vegetables will last at least a few days without refrigeration, as will baked goods like breads. When stocking up on these items in advance of an emergency, make sure to use them first before they spoil.
Water Supply
A fresh water supply is absolutely critical when preparing for an emergency. It is estimated the average adult should drink two quarts of water daily. Where the climate is warmer, even more may be needed. In addition, another two quarts is estimated to be required for cooking and personal hygiene, which amounts to a full gallon of water per day per person. Over a two-week period, a family of four would need to have 56 gallons of water available. This is a lot of water and a lot of storage space. Fortunately, there are options and at least some preparation time. There are choices for acquiring and storing water ahead of time and potential water sources may be available even after a disaster strikes.
Bottled Water vs Own Containers of Water
The easiest and most convenient way to store an emergency supply of water is to purchase it commercially bottled. Make sure supplies are maintained within expiration dates, and leave containers unopened until ready for use. While individual-serve bottles are convenient, they can be bulky to store and more expensive. Larger half-gallon, gallon and even larger pre-packaged water containers are especially useful for cooking and hygiene.
If the decision is made to store water in your own containers, you should follow some basic guidelines. Only purchase containers designed for storing water. If you intend to reuse containers, two-liter soda bottles are best. Avoid using cartons or plastic jugs once used for milk or juices. Protein and sugars can leech into the plastic of these jugs, creating an environment for bacterial growth when storing water.
If you are reusing containers, it is important they are cleaned properly. Clean bottles using standard dishwashing liquid, taking care to make sure all residue soap is rinsed away completely. Once rinsed, the bottles should be sanitized using a solution of one teaspoon of liquid, non-scented household chlorine bleach to a quart of water. Make sure the sanitizing solution touches all surfaces of the bottles, and then rinse them out completely with fresh water.
If you are filling bottles using chlorinated water from a community water source, the water will not need to be treated further. If, however, you are using water that comes from a well, add two drops of un-scented liquid household chlorine bleach to every gallon of water you intend to bottle. The bottle should be sealed tightly, and you should not touch the inside or the cap. Date the bottles with a marker. It should then be stored in a cool, dark place. Water not commercially bottled should be replaced every six months.
Water Sources
Your home may have some untapped water resources that could become invaluable in an emergency. It also may contain some resources that should be avoided.
In an emergency, your home can contain some safe sources, if they are isolated from any outside pipes that may be damaged or if a city supply has been contaminated. Turn off the main water supply to your home to isolate it from outside contamination.
Water can be drained from your water tank once the electric or gas is turned off. Water tanks generally have a faucet near the bottom of the tank where water can be accessed. Water pipes will also contain water that can be best drained from faucets at the lowest level of a house. Ice cubes may also be a source of fresh water.
Water in toilets should only be used for human waste. If your home has a swimming pool, the water should only be used for bathing. Neither should be consumed under any circumstances.
Water resources may also be available outside the home, when appropriate care and steps for treatment are taken. Water filter straws may be an option in some cases, but should not be relied on. Do not use flood water, water that is dark or that has debris floating in it. If water has an odor, it should be avoided. The best resources for water that can be treated to consume includes lakes, rivers, rainwater, ponds and natural springs. These sources should only be used, however, once your bottled water resources have been depleted.
There are a variety of ways water can be treated, and each has its limitations. It is best to start each process by filtering the water through coffee filters or paper towels. This will at least eliminate larger particulate matter.
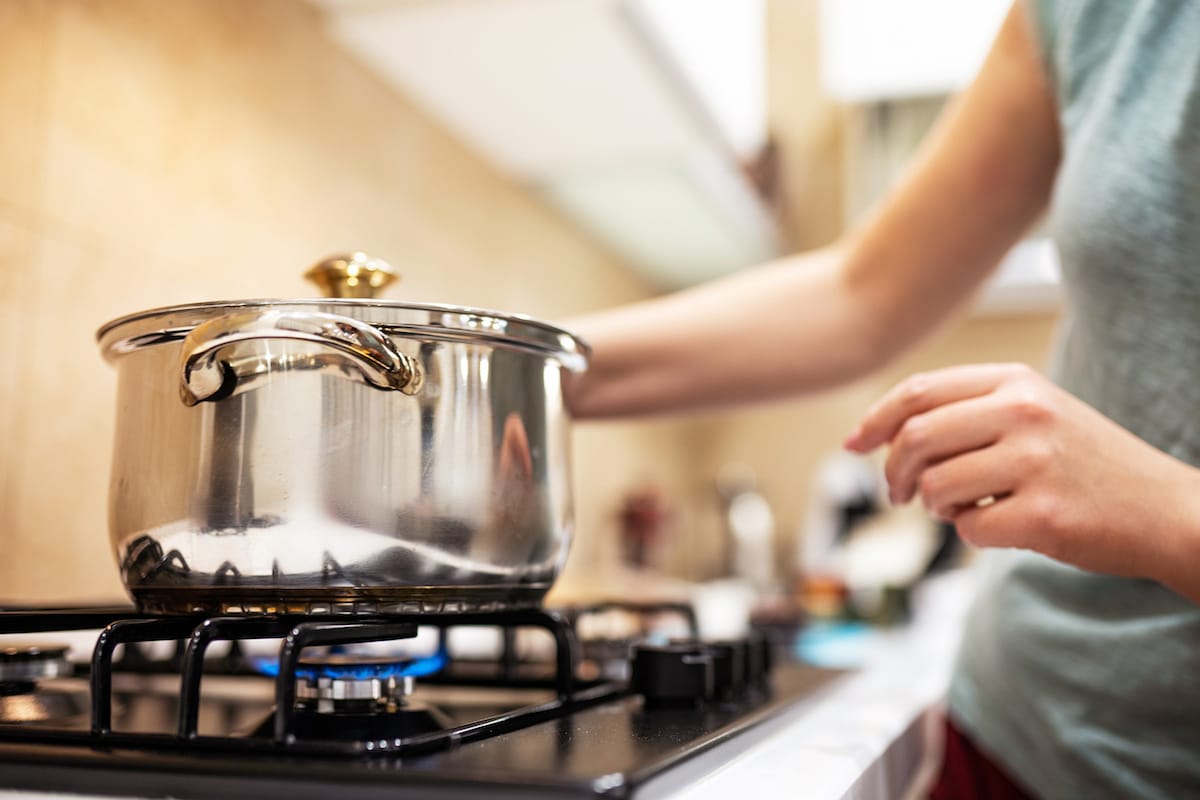
Boiling Water
One of the best and easiest ways to treat water is through a rolling boil. Allow water to boil in a kettle or pot for a full minute and cool. Since boiled water lacks oxygen, taste can be improved by pouring it back and forth between two clean containers.
Chlorinate Water
Unscented, liquid household chlorine bleach can be used to kill microorganisms in water. Use 1/8th teaspoon of newly opened bleach to a gallon of water; stir and let it sit for about half an hour. If the water doesn’t have a slight odor of bleach, repeat the process. If it still doesn’t have a small odor of bleach, search for another water source.
Distill Water
Distilling water can remove stubborn microorganisms, heavy metals, salts, and other chemicals. Fill a pot partially with the water you wish to distill. Tie a cup on a string and attach it to the lid handle of a pot. Invert the lid onto the pot so the cup hangs above the water. Bring the water to a boil. The distilled, steamed water will collect in the cup, which can be cooled for safe drinking.
Food Safety and Sanitation in an Emergency Situation
Although food safety and sanitation are important any time, they are particularly important when there is an emergency situation. Lack of power and water can make it more difficult to maintain clean surfaces and utensils. A lack of refrigeration also puts perishable food supplies in jeopardy. In addition, family members may become more susceptible to illness during a stressful emergency situation.
When the power goes off, the clock begins ticking on your food supply. Here is how to best approach managing your food when the power goes off.
If the Electricity Goes Off
When the power goes off, you may not have an immediate indication on just how long you will be without it. The severity of the event may give you an indication, and the authorities may provide an estimate, but you may not really know. It is therefore best to have a solid, logical plan for working your way through your food supply.
When your power goes out, it is best to consume refrigerated foods and fresh foods you may have in your pantry first. These foods may become unusable in just a few days without refrigeration, so it is best to take advantage of them. Secondly, one should begin to use foods that have been stored in a freezer. Limiting access to the freezer will keep it cooler longer. These foods can be used when thawed, but still need to be cold. Finally, you should begin to access your non-perishable foods. These are the foods that should last for weeks, months and even years without refrigeration.
How to Cook Without Power
Cooking without power can take some imagination and creativity. It will also take an assortment of supplies, tools and utensils. It helps to remember that you don’t need electricity to cook. You do, however, need some form of heat. Fortunately, heat is available from a variety of resources, including propane, candles, canned heat, wood fires and even solar. In this section, we’ll look at some of your options for cooking without electric power and the tools that will prove to be useful. Keeping these materials handy can prove to be valuable in an emergency situation where you may need to cook without power.
Cooking Supplies
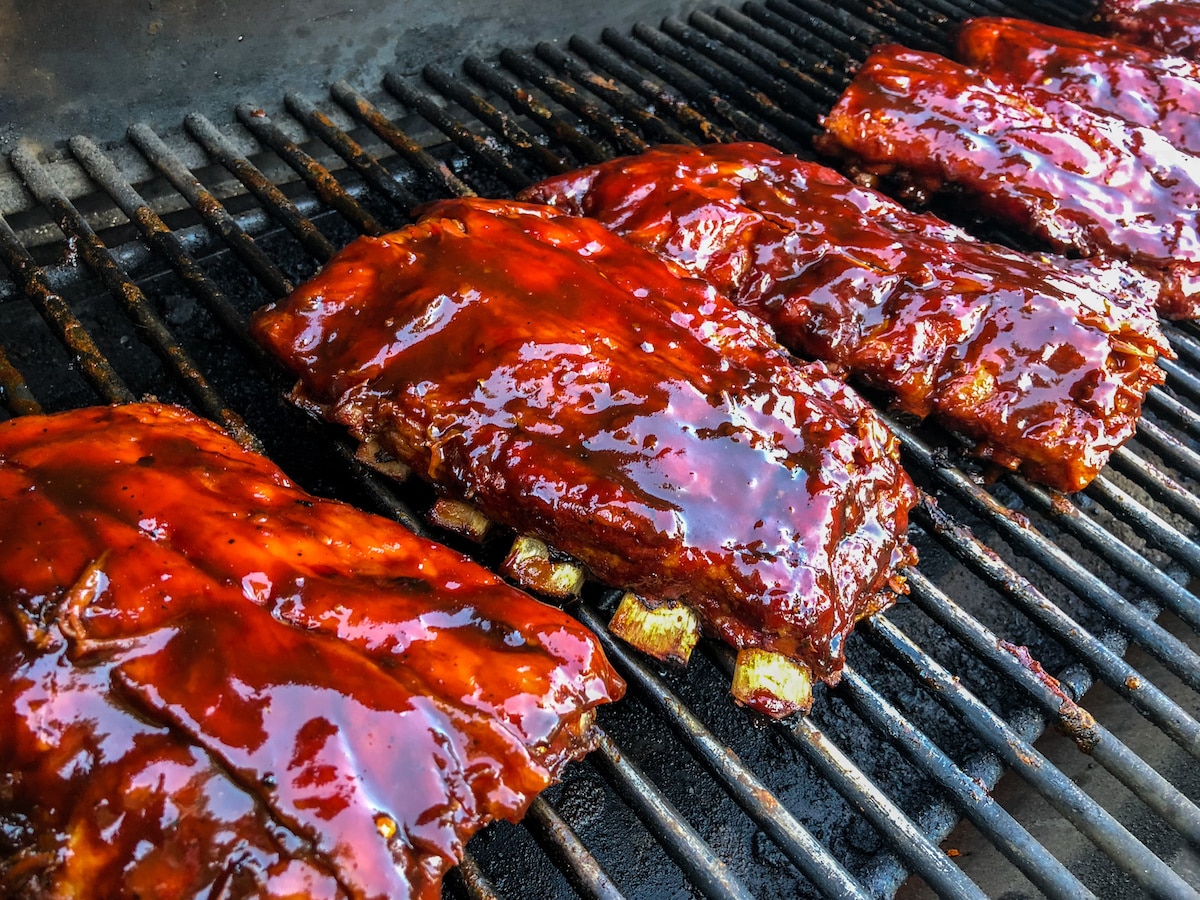
The supplies needed for your particular situation will depend largely on what you will likely use as your main cooking source in the event of power loss. If you have a propane grill, for example, you will want to have at least one spare tank of propane. If a charcoal grill will serve as your cooking source, you will need a supply of matches, charcoal, and lighter fluid. You’ll want to maintain a supply of wood if a fireplace or outdoor fire pit is used.
Your emergency kitchen tools and utensils should also include long-handled tongs, long-handled spatulas, knives, forks and spoons. Make sure you have a manual can opener, scissors, pots and frying pans. You’ll want a selection of bowls for mixing and eating as well as kitchenware. Disposable plates and utensils are an option should you want to conserve on water.
If you will be cooking over an open fire or a portable wood stove, a grill grate can come in handy, along with a tripod and dutch oven. When gathering your supplies, mentally go through your food and water supply. Consider the various items you may need to make life just a bit easier—and more flavorful. Don’t forget seasonings and even individual packets of ketchup, mustard and other condiments.
Make Ash Cakes
One of the things your family may miss during an extended power outage is fresh bread. There is an alternative that is rather simple to bake, and is a bit of a throwback. “Ash cakes” are made from just-add-water pancake mixes. They are easy and fast to cook.
Ash cakes can be made in any wood fire with minimum utensils. Take the simple pancake mix and moisten with water until a dough-like texture is achieved. Pat into small cookie-sized shapes, and toss into the coals. The pancake mix will begin to rise, and after a couple of minutes, they should be turned with tongs or a stick. After cooking until brown on the other side (another minute or two) they can be removed from the coals. Brush off excess ashes and you are ready for a tasty, fresh-baked treat.
Ash cakes can add some variety to your emergency food diet, and cooking them together as a family can be a nice distraction during an otherwise difficult time.
Cook with Foil
Few materials are more versatile for cooking in an emergency and without power than foil. If you don’t have a mess kit on hand, foil is more than capable of getting the job done. Foil is flexible, holds up under heat and can be placed directly into wood or coal fires. It can be shaped to steam foods, fry foods, bake foods or grill them. No emergency kitchen kit should be without a supply of foil.
Foil packets are a popular way to cook vegetables and even complete packet meals. Cut vegetables and potatoes, and place them with oil or butter in a sealed foil pack. Place the foil packs on hot coals, turning occasionally. Foods will steam or bake to perfection with a little practice.
Foil can also be shaped into pan-like or even cookie-sheet-style forms to cook foods. It can be used to help foods from falling through grill grates and can even package leftovers. Baking a potato couldn’t be easier than wrapping it in foil and tossing it into or onto a grill. For emergency purposes, invest in a good supply of heavy-duty foil for greatest versatility.
Use Spits and Skewers
Spits and skewers are a superb way to cook smaller chunks of meats and vegetable combinations. The smoky flavor better permeates these chunks of food, and cooking can be done in minutes or it can be done slowly on a campfire rotisserie. Foods prepared on spits and skewers also lend themselves to being basted with a variety of liquids or marinades.
Metal skewers can help cook foods from the inside out. For many, marshmallow skewers are a better choice than placing foods directly on coals. Care is required when removing or turning skewers over so food chunks will not slide off the skewer. Many prefer squared skewer shafts as opposed to round ones for this reason.
Try a Solar Oven or Reflecting Oven
While many emergency cooking techniques like open wood fire, coals and canned heat are throwbacks, solar ovens and reflecting ovens are a relatively new addition to cooking options in an emergency.
Solar cookers use the power of the sun to heat and cook foods. Both solar ovens and reflecting ovens can produce meats and baked goods that are moist and tender. While a solar oven or a reflecting oven can take more time and patience than a normal oven, the results can be surprisingly impressive.
Using a solar oven is relatively simple. Place the food inside the oven compartment, line the oven up with the sun and allow it to do its job. Of course, a solar oven works best in the sun, and moving it into direct sunlight every half hour or so will improve its performance.
A reflective oven is more of a make-shift metal compartment that is used to cook foods from heat directed or reflected from a fire to do the baking. Either device can serve to bake breads in about four hours, and apples can be baked in about five hours. If you happen to have a roast, it can be pull-apart ready in about six hours. One of the reasons both solar and reflective ovens are so valuable in an emergency situation is the versatility they bring to meals, including the capability to make desserts and baked goods.
Canned Heat
Canned heat is a reliable, proven source of heat to cook foods. They are easy and convenient to store, and their flammable contents can be lit easily with a simple match, once the lid is pried from the can. Canned heat provides a reasonably consistent flame that is easy to manage.
Canned heat is frequently used in chaffing dishes and can be used with metal burners to support a pot or pan. Canned heat can be used to boil water or soups or even to fry foods. They can be extinguished and re-ignited when partially used.
Even when not used as your primary cooking source, canned heat is an easy-to-use, valuable resource as a back-up in an emergency situation when the power is off.
Camping Stoves
Small, portable camping stoves are perfect solutions as back-up cooking options when the power goes out. They work very similar to a home gas stove cooktop and thus will be familiar to many users. Flames can be adjusted from a low, warming heat to a larger flame, capable of producing a rolling boil.
Camping stoves should only be used in well-ventilated areas or outside. Some modern camping stoves will include a solid, griddle-style piece that can be used over one or two of the burners. This allows users to cook pancakes and other fried or grilled foods.
Camping stoves are made convenient, in part, because they use smaller propane cylinders as opposed to large propane tanks. These cylinders are affordable and easy to store, attach and replace.
Rocket Stoves
In a pinch, when cooking options or fuels may be limited, a can stove or a rocket stove can be remarkably efficient at creating heat to cook upon. A can stove is simply what it sounds like: a heating device made from a can. Generally, large juice cans provide the most solid form of a rocket stove and the capacity to hold sufficient fuel. A rocket stove is simple and effective.
The tops and bottoms of large, sturdy juice cans should be removed, along with any paper labeling. Ventilation holes should be punched around the bottom rim of the can. Load the can with a variety of fuels, including sticks, crumpled paper or wax-coated cardboard. The fuel inside the can is ignited from the bottom ventilation holes with a match or lighter, with the pot or pan placed on top. The heat from the rocket stove may be short-lived but can be intense enough to quickly boil water.
Car
In an emergency, the heat from your car’s engine can be resourced to cook or heat foods. Keep in mind this should only be done in an emergency and out of doors where the car’s exhaust will not be a problem. All you will need is the food you wish to cook or heat, foil, some spray oil and your car’s engine.
First, you’ll want to determine which parts of your engine produce the most heat. Start your engine and let it run for several minutes. Move your hand above the engine to get a sense of where the warmest area is.
Spread out sheets of foil, several layers thick for greater durability. Chop and place the foods you wish to cook on the foil that has been sprayed with cooking oil. Carefully fold the food into a large packet of foil that seals in any liquids. This packet can now be placed on the hot engine to cook the food.
The packet should be turned several times, and care should be taken to avoid puncturing the packet, which could cause leaks. If clearance allows, you can even close or partially close the hood to keep heat in.
Care will also be need to be taken to remove the foil packet to prevent punctures and leaks. Cooking time will vary depending on what you are cooking and the heat generated by your engine.
Additional Advice About Food in Emergency Situations
There are multiple aspects about maintaining an emergency food supply and getting through an emergency situation without power. Keeping track of expiration dates is key. If you store your own water, make sure it is replaced every six months.
When enduring an emergency situation, food and water should be treated differently. It is important to stay hydrated, so drink water as you feel it is necessary. On the other hand, your body can survive with less food than you may believe. If food is in short supply, don’t be afraid to ration it.
Move through your food resources in logical fashion using fresh foods first, followed by frozen foods. Use your non-perishable foods last, again paying attention to expiration dates.
Do not use canned or packaged foods that seem to have become misshapen by inside air. Dispose of these products. Of course, you want to be absolutely sure you have a working can opener.
Remember, Preparation is Key
You do not have to be a survivalist or prepper to be ready for an emergency. It only takes some conscientious shopping choices week after week and maintaining an inventory of in-date foods. Make sure you have at least a sufficient water supply, and identify your main cooking source in an emergency and when you may be without power. Make sure you have an adequate supply of fuel.
You’ll also want to keep in mind that as your family changes, your needs and desires may change too. Be ready to adapt your resources and have confidence that you will be better prepared for the next power outage emergency.
The responses below are not provided, commissioned, reviewed, approved, or otherwise endorsed by any financial entity or advertiser. It is not the advertiser’s responsibility to ensure all posts and/or questions are answered.